

Who Repairs Chipped Pottery New Orleans
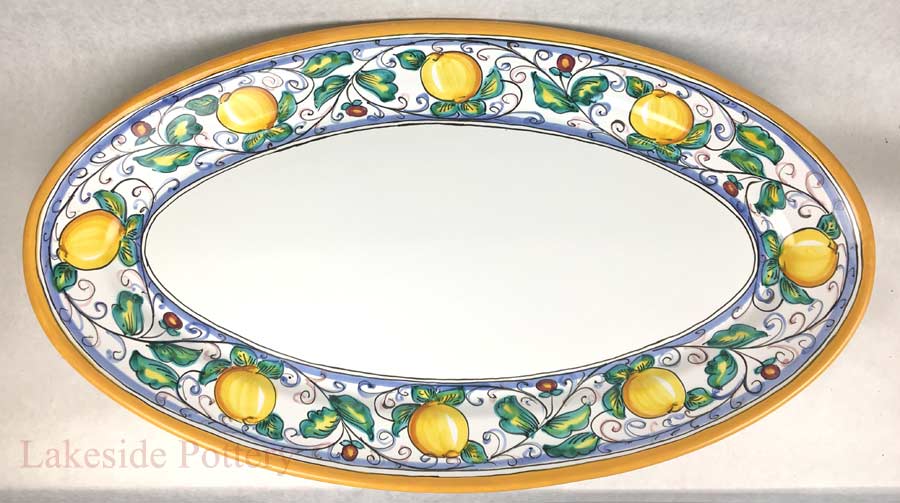
Step-by-step process of performing a seamless repair on a chipped big Italian platter using the best commercially available materials including cementing, filling, painting, and glazing. This process can utilise to chipped plate, chipped vase, bowl, pitcher, figurine or any pottery, china or ceramic vessel.
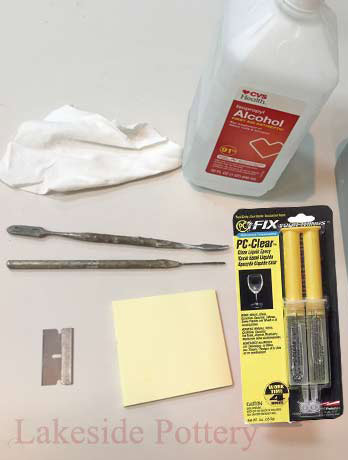
What Will You lot Need | C ementing
one. Two-office clear 5 min Clear epoxy
2. Wooden stick, or a pin-tool
3. A container with pvc pebbles or rice
4 . Razor bract
v. Denatured or 91% Alcohol
6. Paper pad to mix Epoxy on
7. Expert light
8. Protective eyewear
Where to go supplies
IMPORTANT: Ceramic restoration materials are not food-safe, liquid or heat-proof (over 190 degrees F) and repaired items should not be used on cooking or nutrient serving ware more...
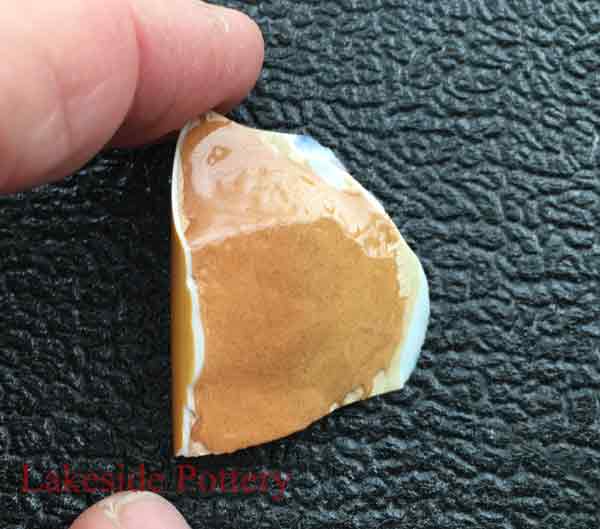
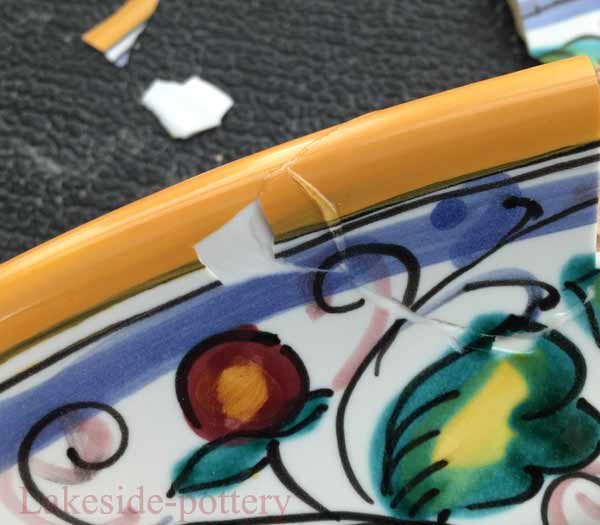
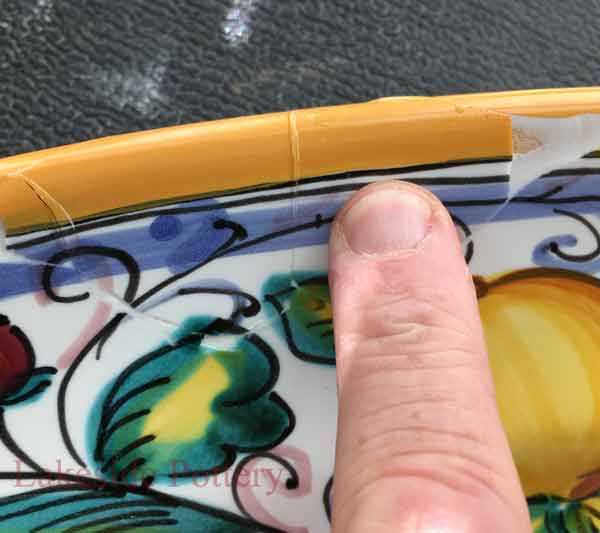
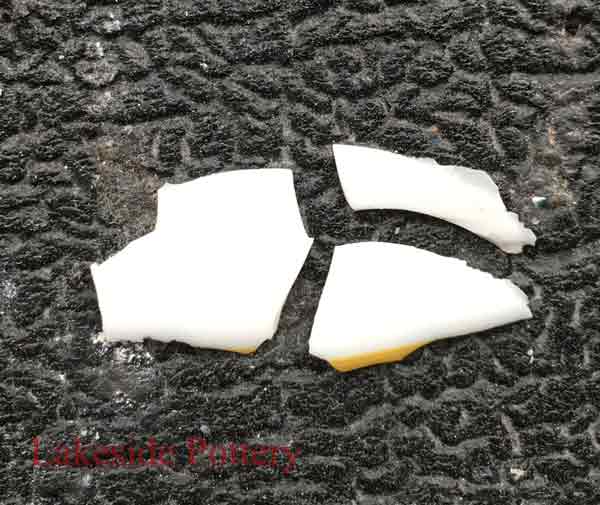
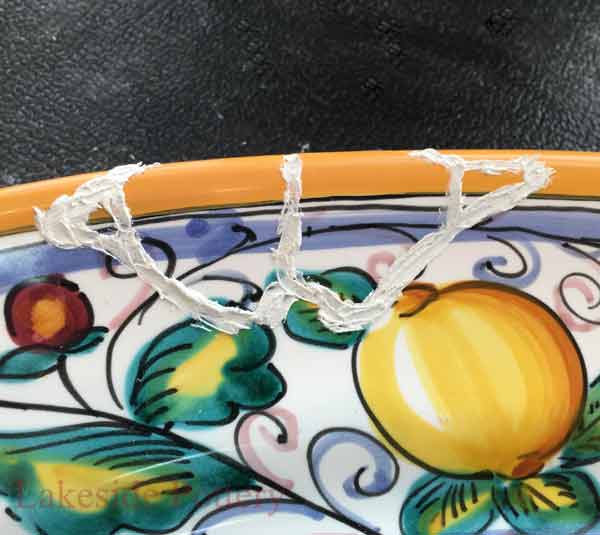
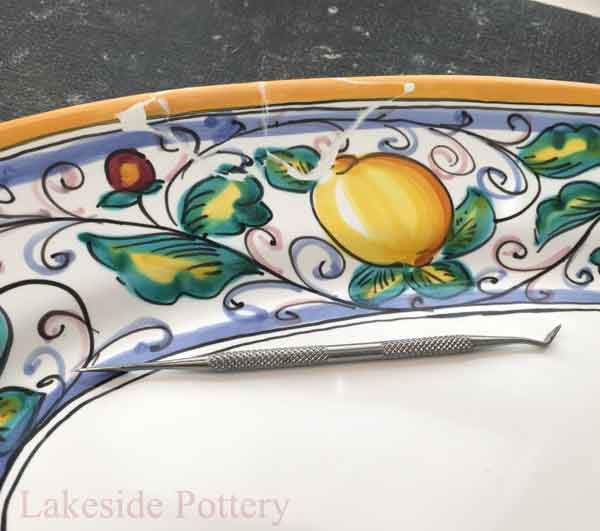
Cementing Ceramic Broken Pieces
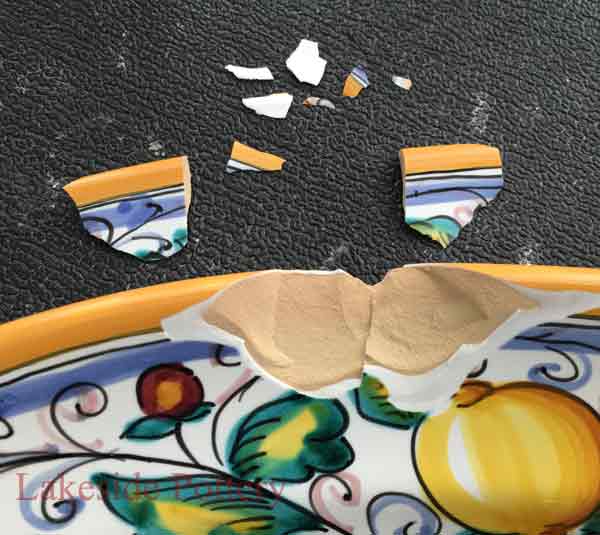
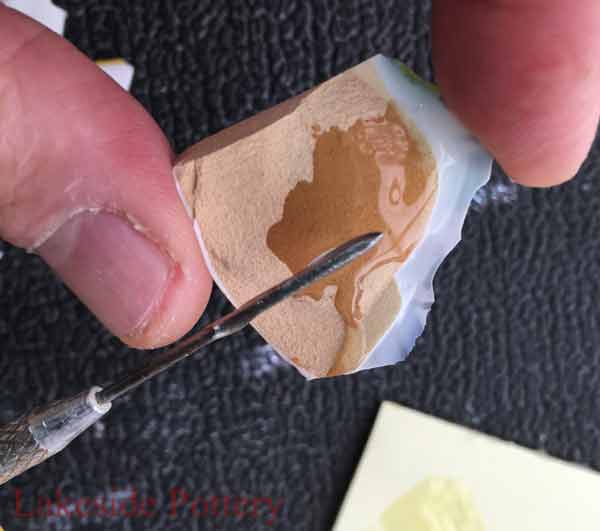
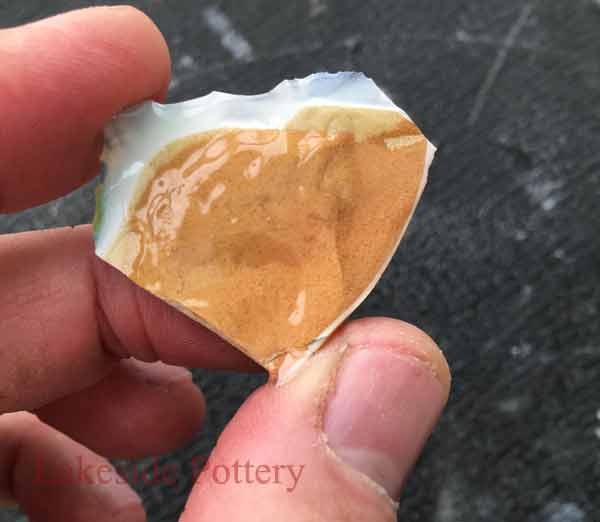
Make sure the pieces are make clean using alcohol. If the item has been stock-still earlier clean off any onetime adhesive, or the new adhesive may not bond properly. Teaching to remove old adhesives.
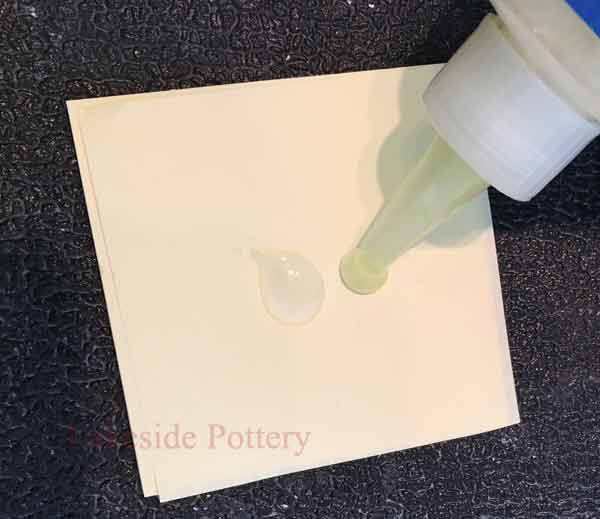
Place even amounts of v-minutes clear epoxy on a newspaper or paper-thin pad
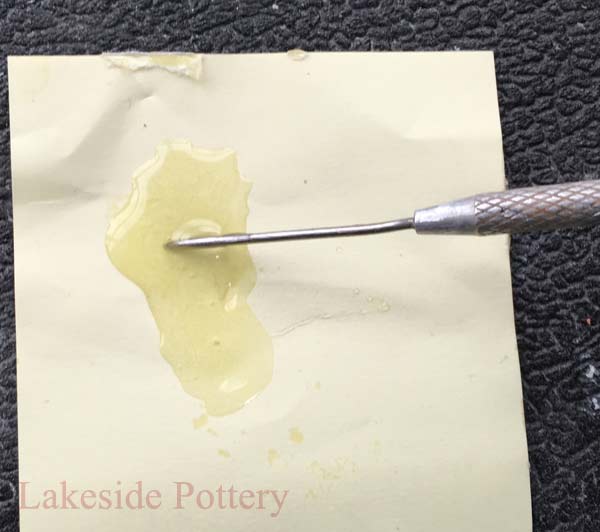
Mix epoxy well with a pivot tool, paper clip or a wooden stick.

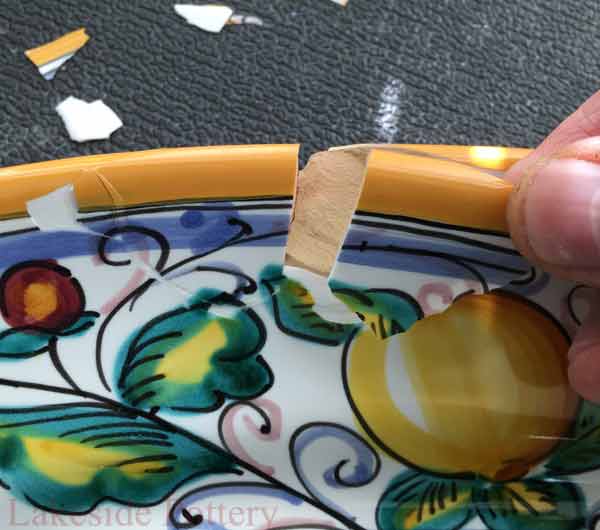
Apply epoxy mix to i side using a pintool or a wooden stick
Employ only enough adhesive to cover the edge. Too footling volition leave gaps, resulting in a weak repair
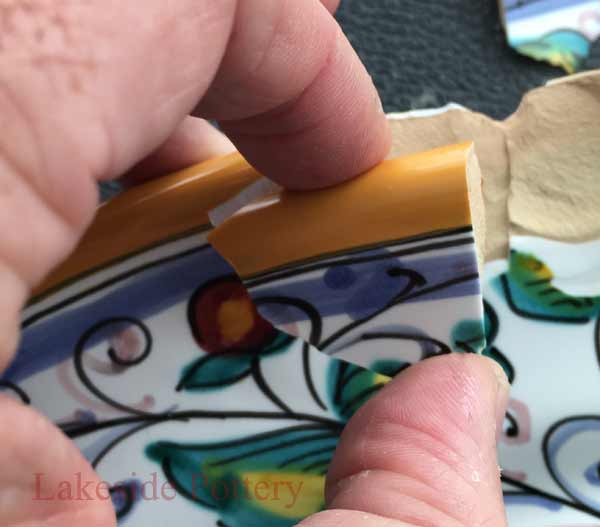
Place broken piece over the epoxy. Of import: You have simply about 60-90 seconds from kickoff of epoxy mixing to complete the broken slice's permanent placement before the epoxy becomes gummy and not workable
Apace bring together the pieces together while applying light pressure to squeeze actress epoxy out. Y'all merely accept almost sixty–xc seconds from get-go of epoxy mixing to placement before the epoxy becomes gummy and unworkable. Do non wipe off the squeezed-off epoxy to avert smearing.
If your item is cleaved to more than a couple of pieces, plan the attachment sequence to avoid being left with a final slice that cannot exist easily attached or fit in. Numbering the pieces later a dry run is a expert thought and will assist in the actual implementation.
Verify that pieces can stay steady during the cure menstruation (permit it cure at 75 degrees F or warmer)
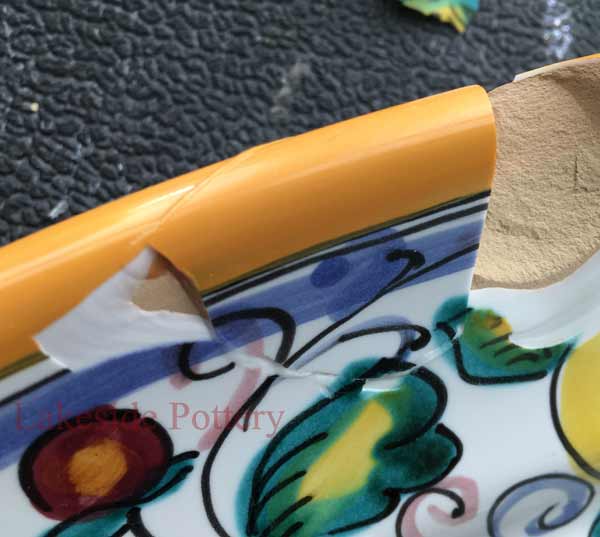
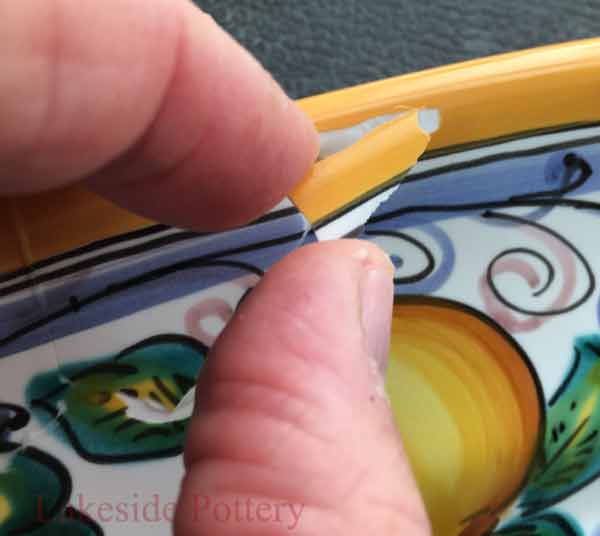
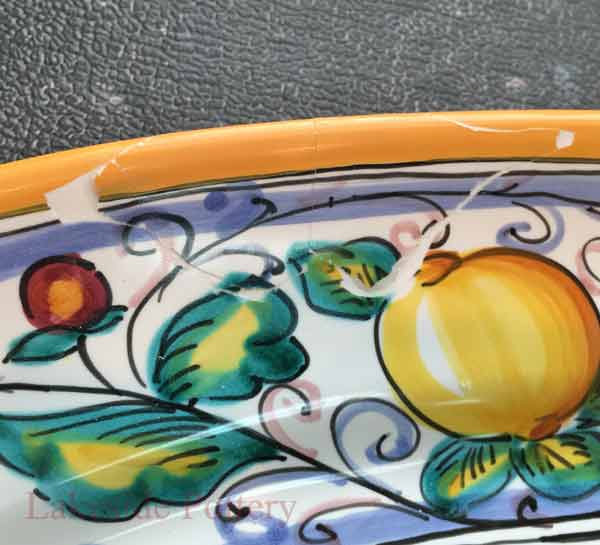
Verify fit with side by side slice. Immediately subsequently applying the previous slice, if epoxy squeezes out into the next piece space, clean it with the pin tool and alcohol to insure it will non interfere with subsequent pieces proper fit
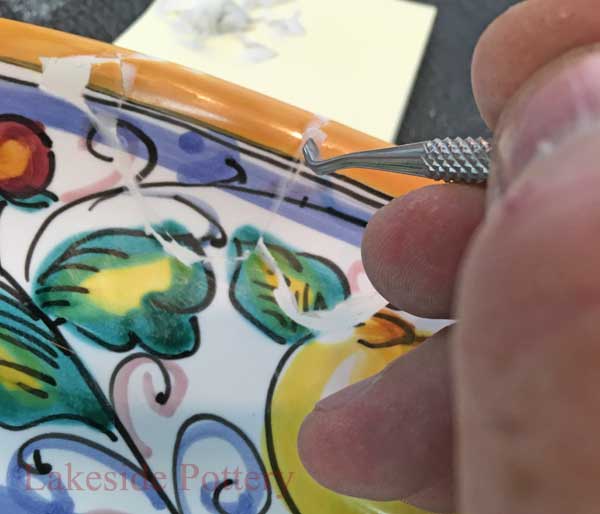
Push hard to squeeze out epoxy
Await 15-twenty minutes before addressing the other side
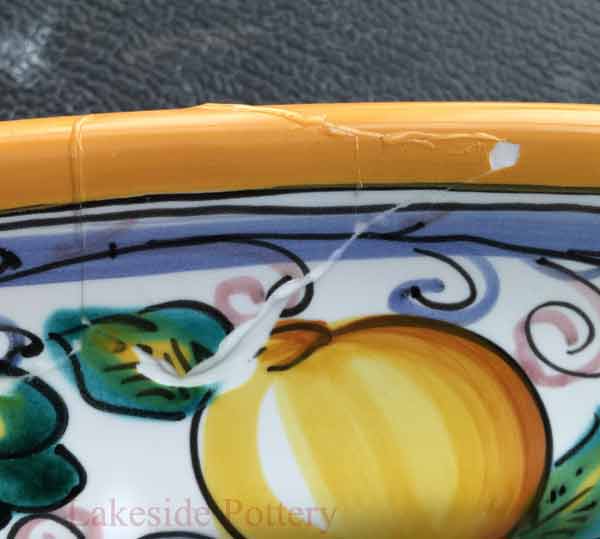
Other side remaining damage
Rear side pieces
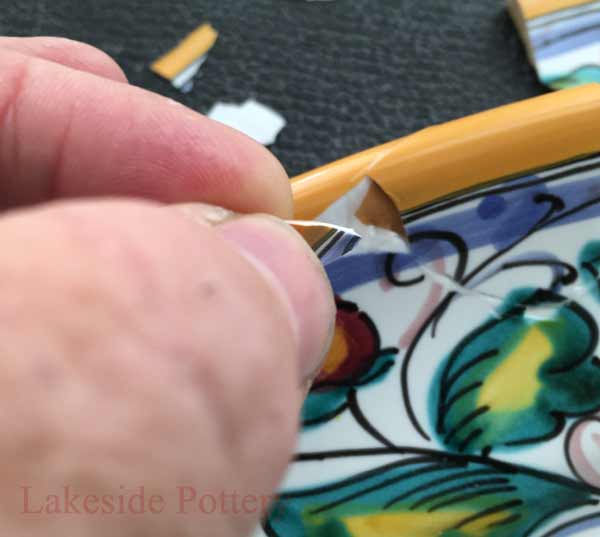
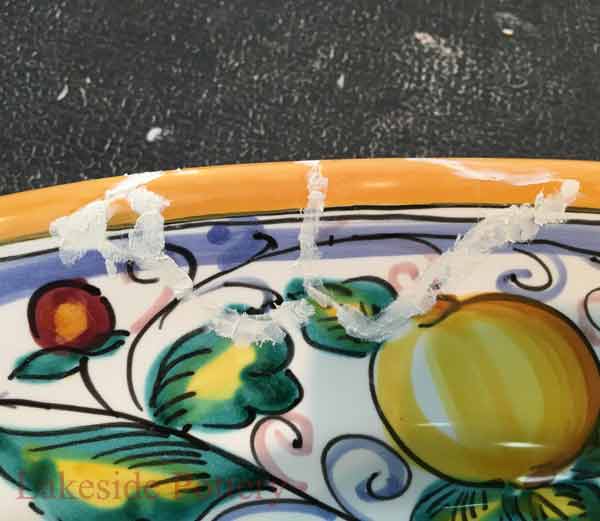
Look ane-two hours before clearing squeezed epoxy
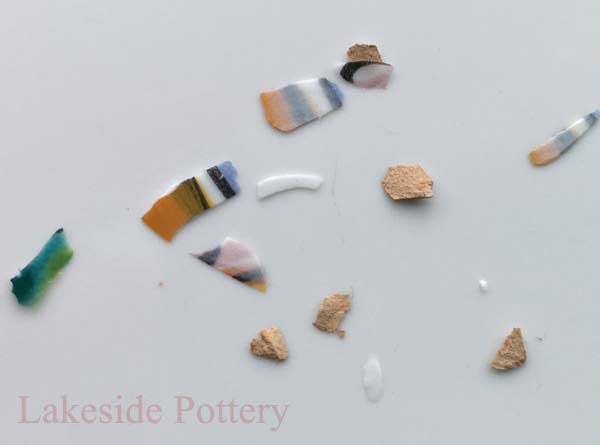
Pocket-sized pieces are not used and can be thrown away
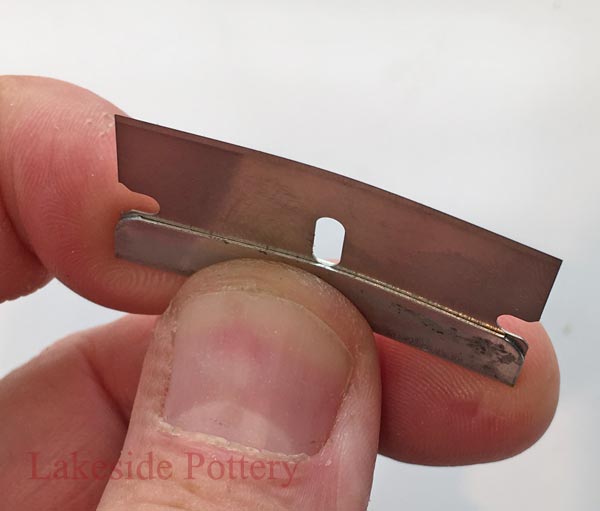
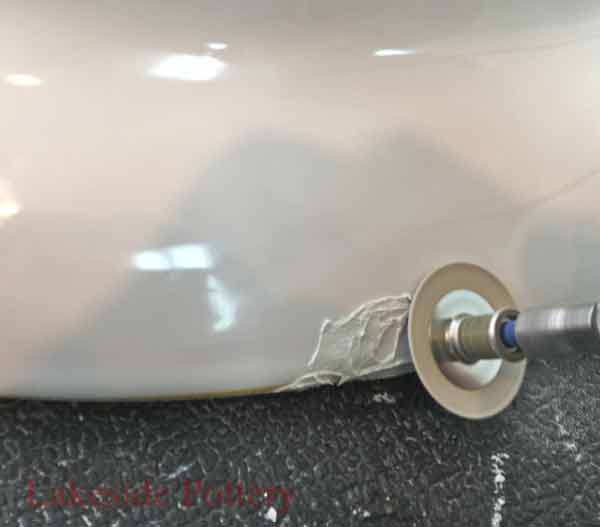
Bend blade for amend access clearing unwanted cured epoxy. Alert - wear protective eyewear
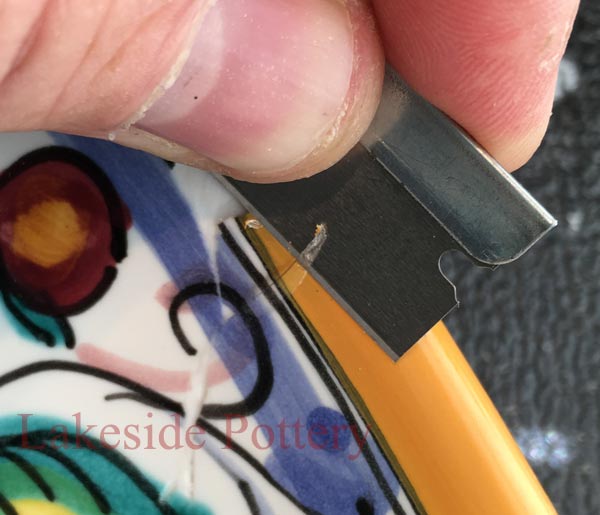
Let the epoxy cure for lx or more minutes before removing backlog cured epoxy with a blade
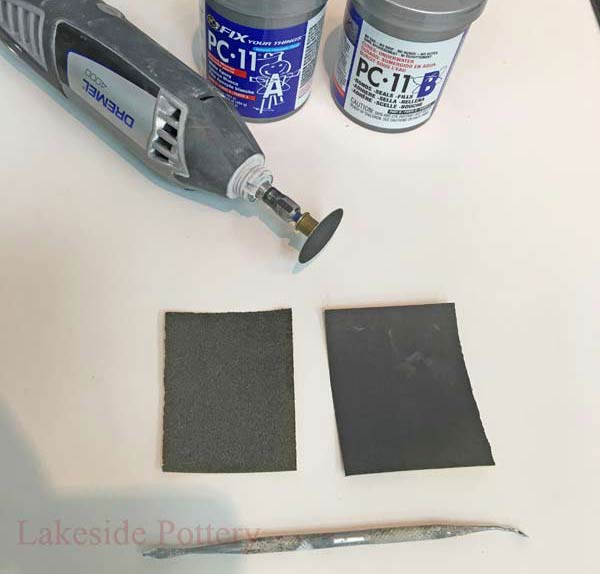
What You Will Demand | Filling and sanding
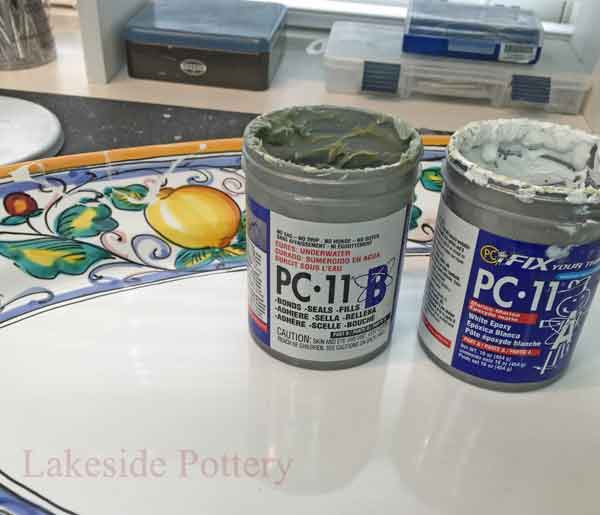
one. Two parts Epoxy filler PC-11
2. Dremel with EZ lock 120 grit disc
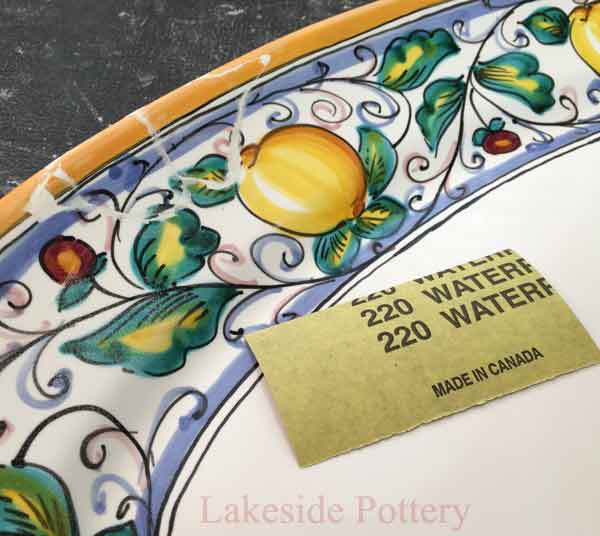
iii. 220 dust sand paper
iii. 400 dust sand paper
four. Rag
5. Mini Spatula
6. Newspaper pad to mix Epoxy on
7. Denatured or 91% Alcohol
Where to get supplies
Of import: Ceramic restoration materials are not nutrient-safe, liquid or heat-proof (over 190 degrees F) and repaired items should not be used on cooking or nutrient serving ware more...
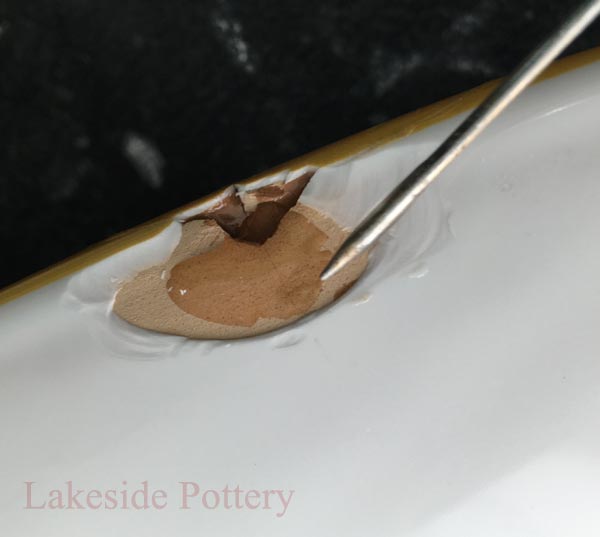
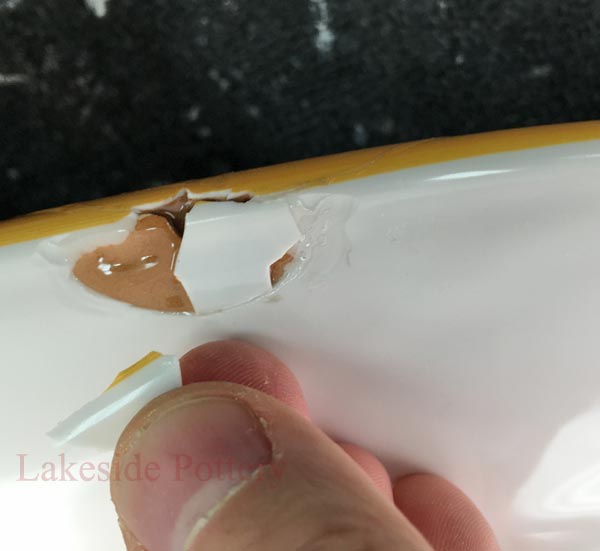
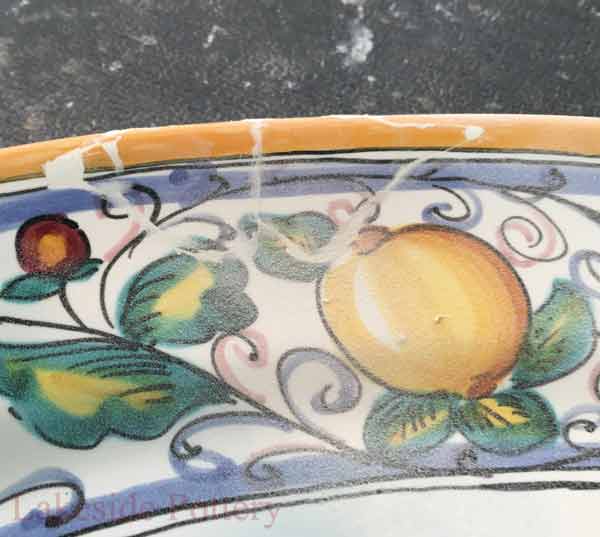
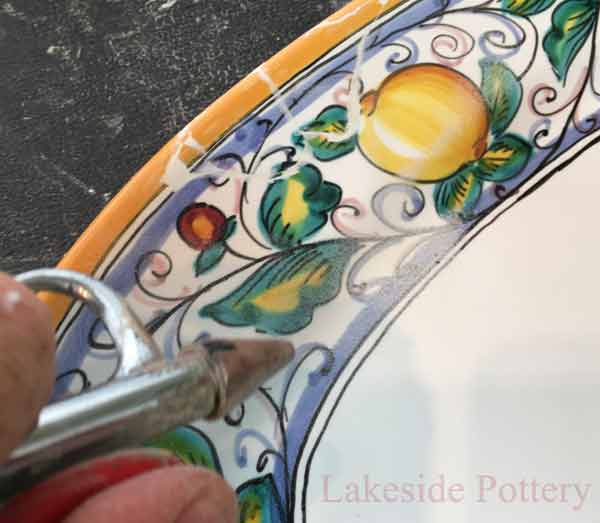
Filling, Sanding and Surface Preparation
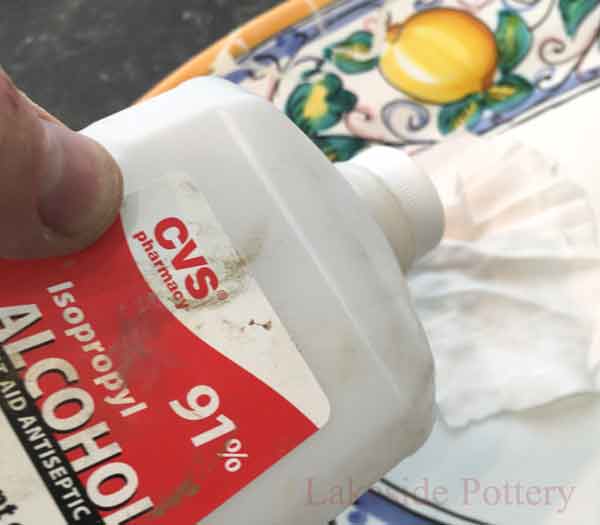
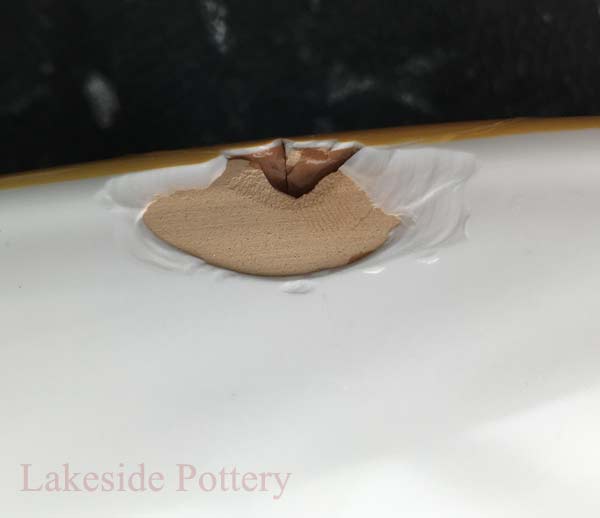
Wipe all surfaces with a 91% booze to remove dust and mitt oils prior to applying filler epoxy
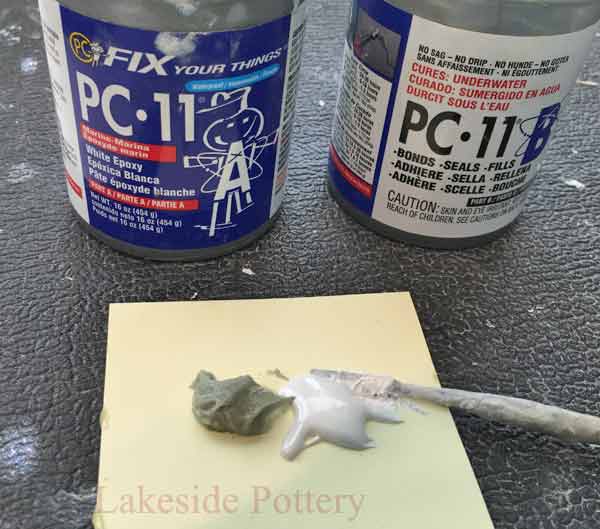
Mix even parts of PC-11 epoxy filler. For ease of application, work in room temperature of 75 degrees F or warmer. We place the PC-11 in a small heater and keep it at 100 degrees F.
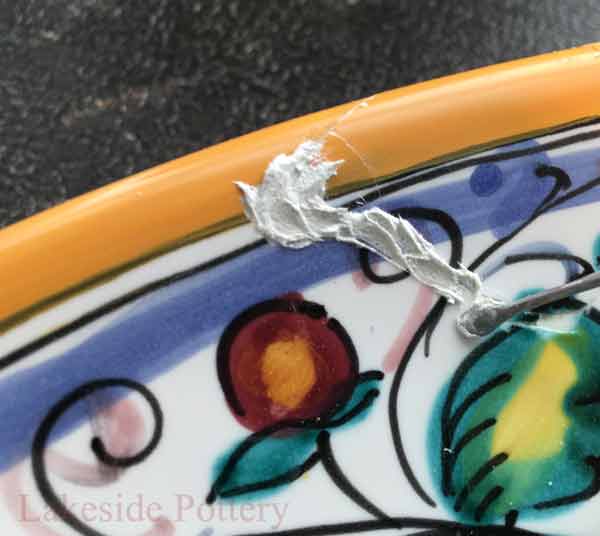
Apply sparse layer of filler while pushing in to fill cracks and missing fragments
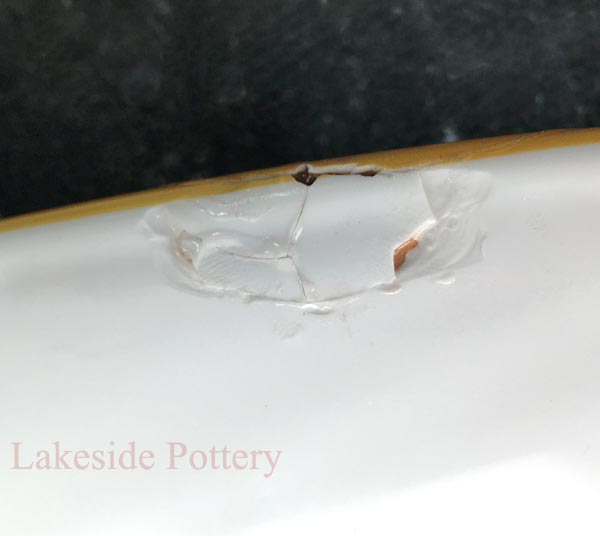
Allow filler epoxy to cure for 12-24 hours (or longer) at a temperature of 75 degrees F or warmer. We identify our filled projects in a 140 degrees F oven over night.
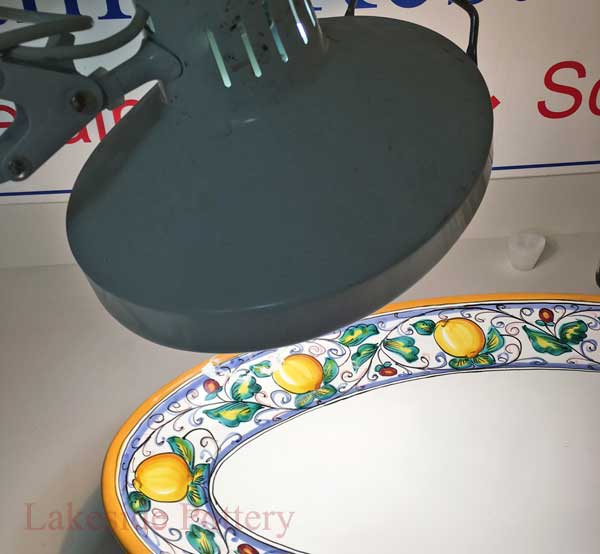
Placing under a lamp is another good pick to optimize hardness for ameliorate sanding performance. Place at to the lowest degree 12" away from repair detail to avoid overheating.
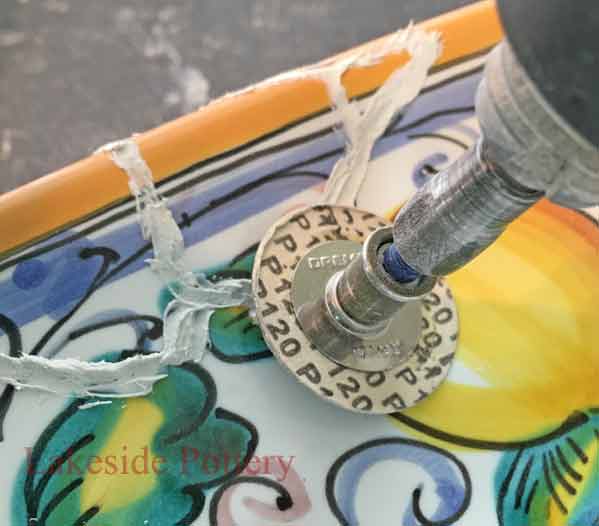
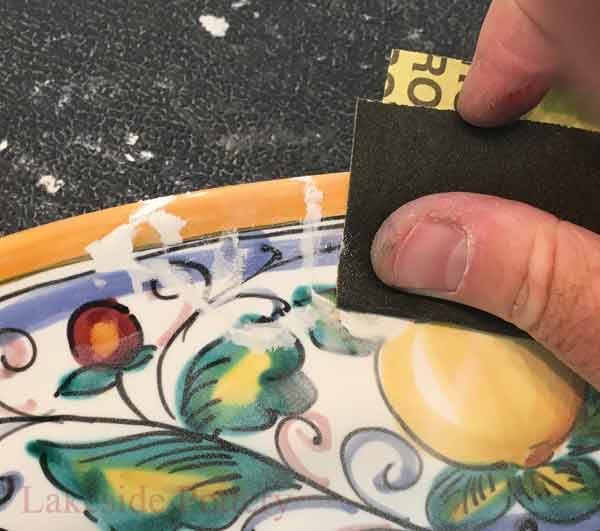
Use Dremel EZ lock sanding disc 120 grit for sanding.

Use low speed to avoid burn marks and use light pressure. Leave the last 10% or and then for sanding by hand.
Warning - article of clothing protective eyewear
If Dremel is not available, sanding the whole task past hand (using grit 220 sandpaper) will take longer merely will yield the aforementioned results
Repeat procedure on platter'south other side
Continue sanding by hand using grit 220
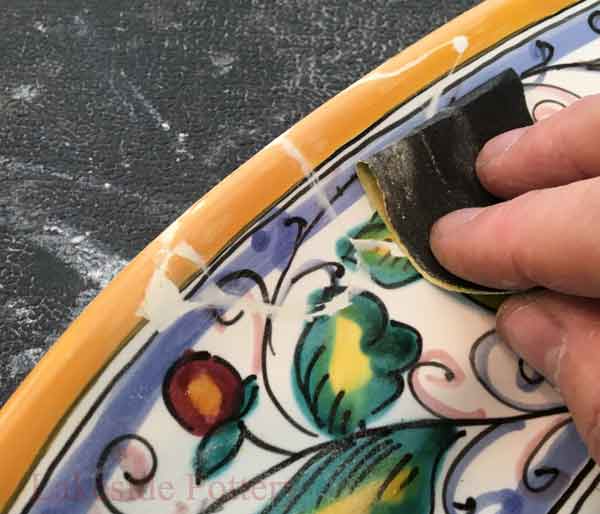
Use long strokes for accurate surface continuity
If upon inspection, missed cracks are establish, repeat the steps higher up for the selected areas
Utilise 91% alcohol for clean up

Afterward the first circular of sanding, a second finer filling is required using a minor sepulcher tool
Same filler (PC-eleven) is used for second application
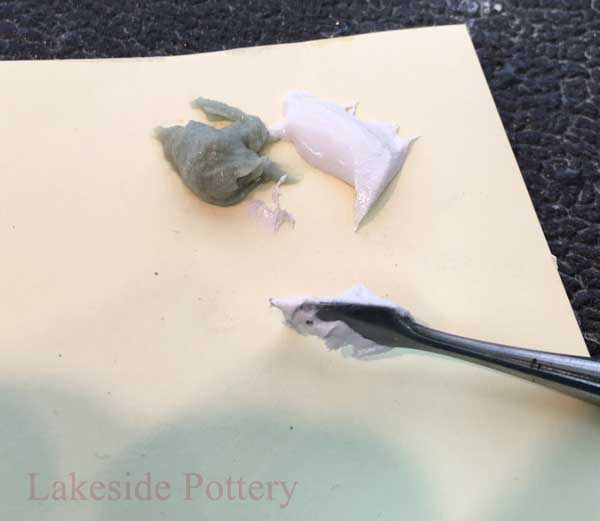
Mix well the epoxy filler two even parts
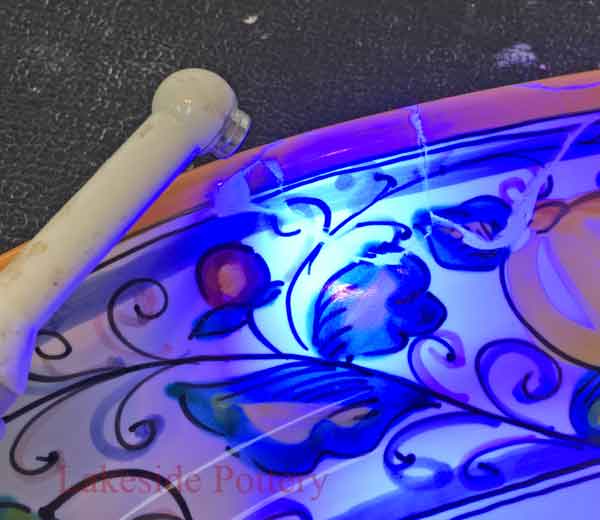
Inspect surface with UV light or a spotlight for any surface defects (cracks, pits, pumps, etc.)
For seamless surface fill up the defects with PC-xi lightly
Await for filler second layer to cure in a warm room (see more above) before sanding
Sand second layer by hand with long strokes using grit 220, then grit 400 and finish with grit 3600. Information technology may exist necessary to use a third or fourth layer if UV / light close inspection reveals more surface defects
Wipe with booze for better pigment bond
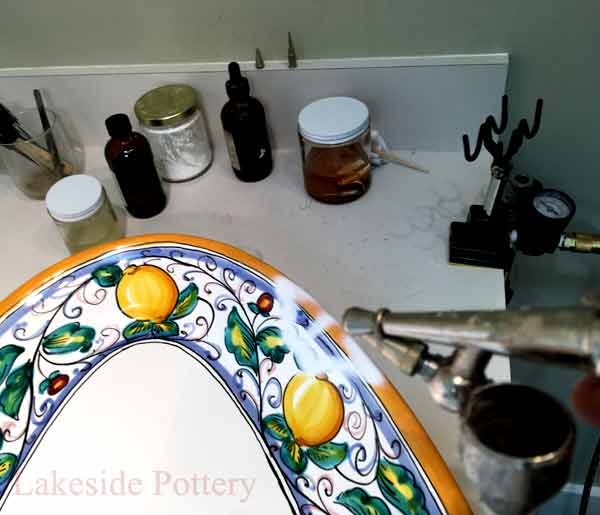
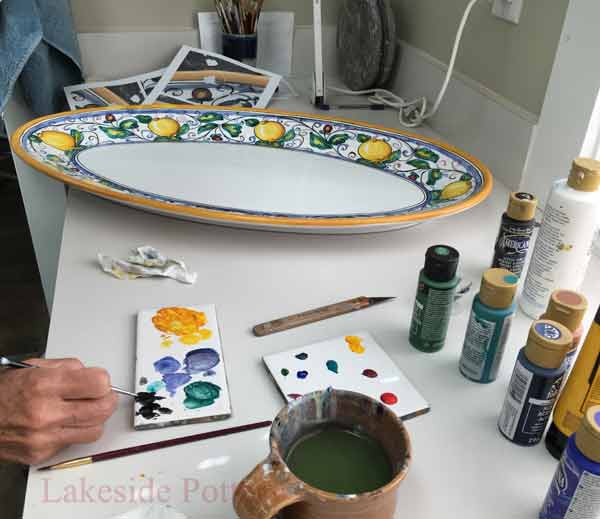
Painting and Glazing
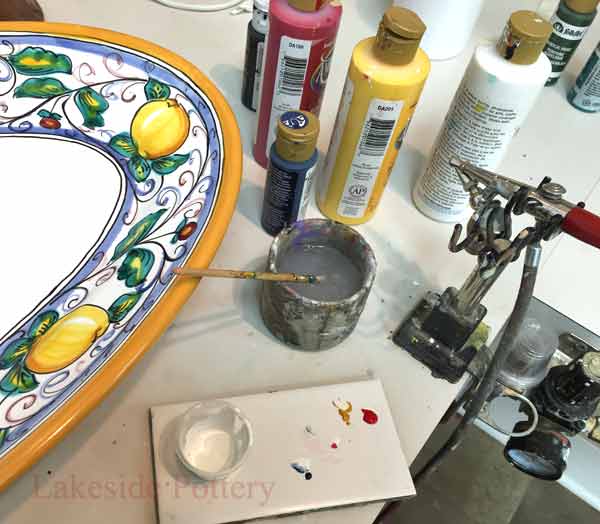
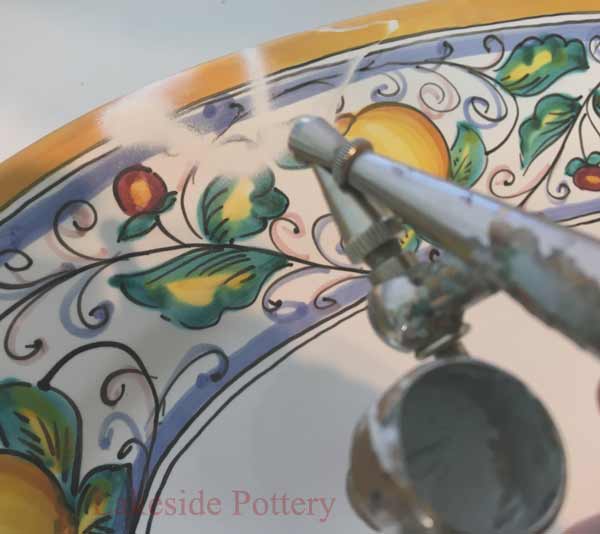
Airbrush over the repair line and taper off for smoothen color integration to original background coat.
Painting over the repair line will erase painting details which will be replenished later
Wait a day or two for the acrylic paint to dry well and apply thin layer of cold coat to protect the practical the painted areas.
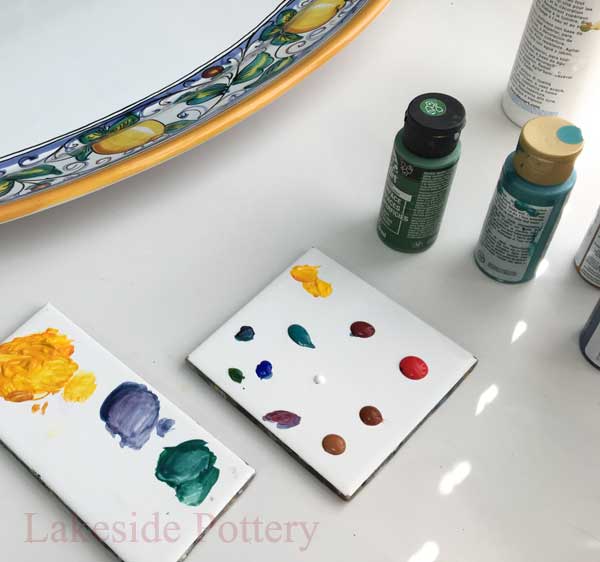
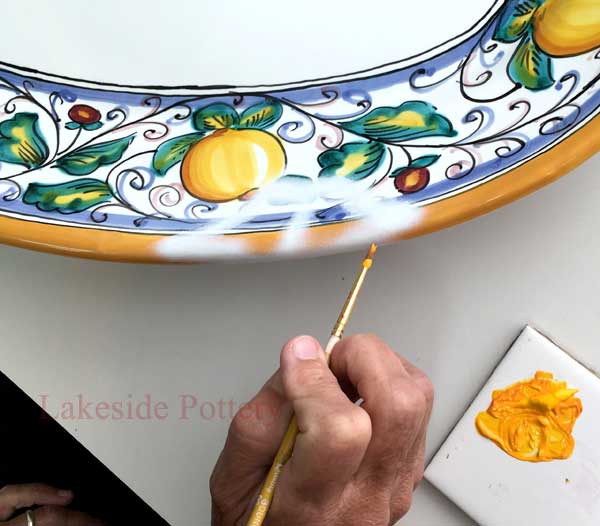
Apply fine brushes to utilize colors
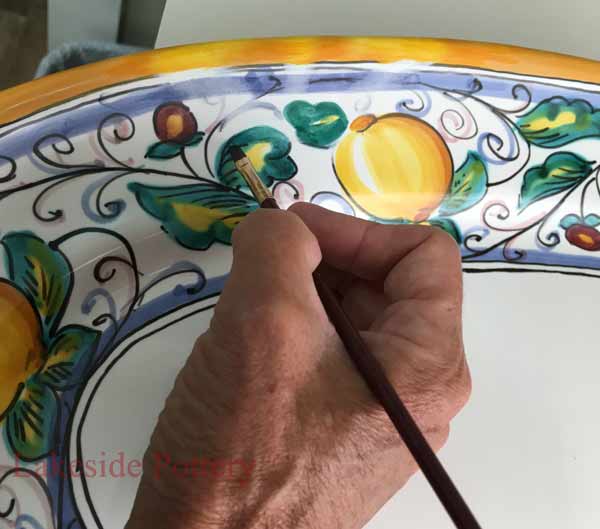
For translucent effect, paint several coats of thinned paints
In this example, apply blackness color last
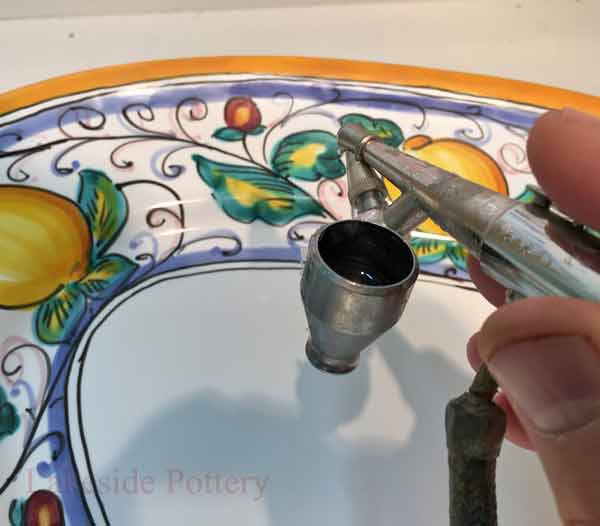
Wait for painting to properly dry (a couple of days) and airbrush clear coat
A second layer of clear glaze may be required. Sand surface with a 3200 grit micro-mesh (afterward waiting a twenty-four hours or two for 1st layer curing), wipe dust off and reapply cold glaze
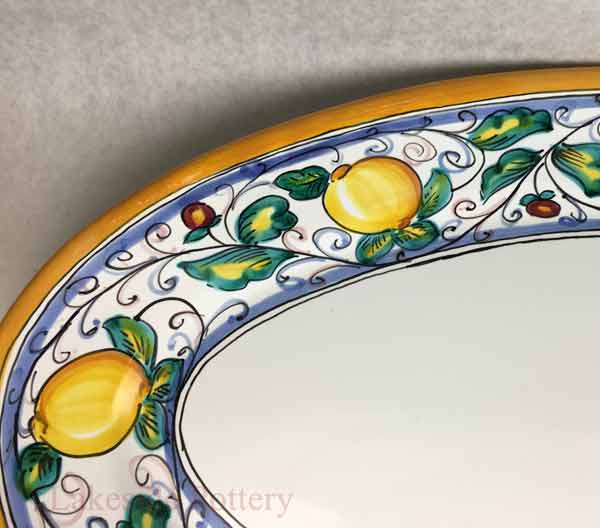
Platter ready for shipment
Remove old repair, Mend the broken segments, fill gaps, sand filler, paint and coat the repaired areas.

Who Repairs Chipped Pottery New Orleans,
Source: https://www.lakesidepottery.com/Pages/Pottery-tips/How-to-repair-chipped-pottery-china-ceramic-step-by-step.htm
Posted by: rousselhigend1992.blogspot.com
0 Response to "Who Repairs Chipped Pottery New Orleans"
Post a Comment